Build a new installation instruction
In this tutorial, we will use VS Code but if you prefer, you can use any other editor or even command line tools.
Step 1. Clone the repository.
-
Bring up the Command Palette (command shift P)
-
Type
git clone -
When asked to provide repository URL, paste
https://github.com/DHRI-Curriculum/install/into the box. -
VS Code will ask you where to save your local clone of the repository. Choose wherever you would like to have it.
-
When asked "Would you like to open the cloned repository?", press "Open in New Window" (to ensure no conflict with any other windows you may have open).
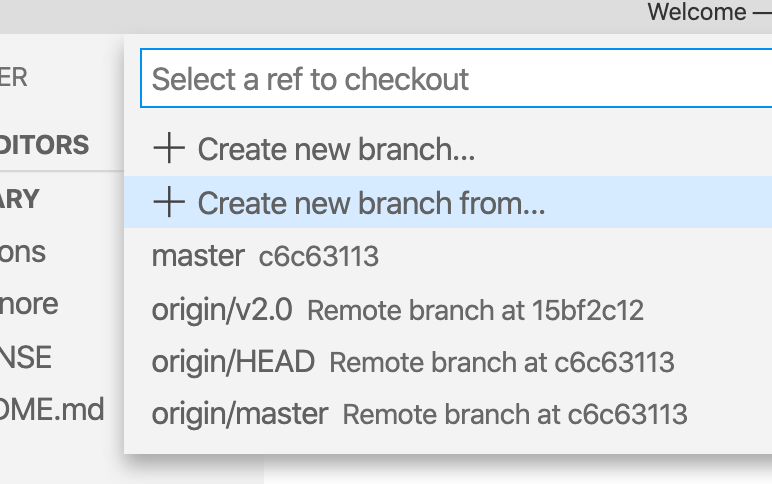
Step 2. Create your own branch.
In the lower-left corner of the VS Code's window, click on the branch name that you are currently working on (likely "main"):

In the menu that pops up, select "Create new branch from...":
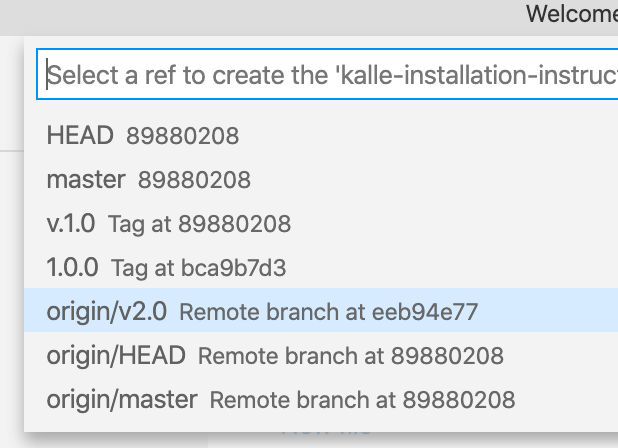
Next, provide a branch name for your new branch (following our style guide, choose something along the lines of v2.0-<your-username>-suggested-terms). Then press enter to create the new branch:

You should then be asked to "Select a ref to create" in relation to your branch. In this example above, since our desired upstream is the v2.0 branch, you will select origin/v2.0:
You should now be on your own branch of this repository. You can verify that you're on the correct branch by checking your lower-left corner that should have your branch name instead of the formerly active branch.

Step 3. Add the installation instruction(s) you believe should be added to the guides folder
Before you start to add content to your editing branch, make sure you're adding instructions to the correct folder, guides inside the repository. The installation instructions should be in its own, separate <software-name>.md file. Keep the filename lowercase and replace spaces with '-'.
Note that there is a template for term.md available to make the following easier to follow.
-
Add the image assigned to the installation instruction as the first line in the file with an absolute link to the image inside the repository's
_django-meta/header-imagesfolder:1 -
After the image, add the name of the software as a level 1 header. The markdown should now look like this:
1
2
3
 # Git (and Git Bash) -
Immediately following the software name, add the required section
## What it iswhere you add a description of the software that this guide will install. Be specific as we consider following installation instructions to be part of the foundational skills that learners will acquire in the DHRI.. -
Under the
## Why we use itheader, add a description that follows the format below:1For the Digital Humanities Research Institute, we use <insert software here> because <insert reason why we use this software. If it is used instead of another one, explain why we have chosen this software.> -
Under the two headings
## Installation instructions: macOSand## Installation instructions: Microsoft Windowsrespectively, add installation instructions: -
Each step should be added as a level 3 header (
###) following this convention:### Step 1: <Insert Step 1 Header> - Each instruction step should follow this convention: A step should contain no more than one or two clicks/dragging files, or entering information into text boxes, unless there is, for example, a form where you may need to input multiple points of information in the same place.
- Include a screenshot for each step - see below for example of how to insert it. If there are more complicated things to do, consider making a GIF. Make sure screenshots are up to date and added inside the
guides/imagesdirectory.
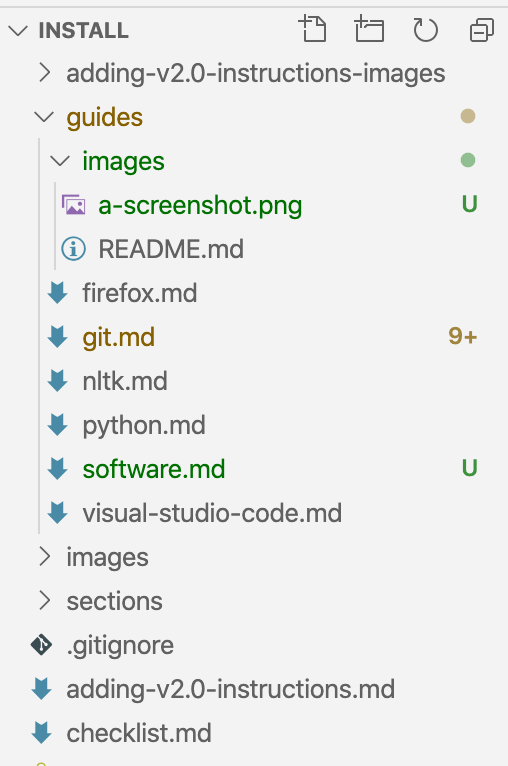
Once you are done with all of the installations instructions you would like to add, your VS Code should look something like this:
Now you're ready to move on to the next step, committing your changes to GitHub.